This is the manual for version 2.3.0 of the ParentEve program from Millerchip Software Ltd. which organises the bookings for parents evenings in secondary schools. This manual describes the operation of the Microsoft Windows build of the program (for Windows 98 and all later versions). The product is also available for Linux, please contact Millerchip Software Ltd. if you wish to use that version instead.
For the Microsoft Windows version of the program, the following system requirements must be met:
ParentEve can be easily installed, run and uninstalled, making it simple to try the program before you decide to use it.
The program is supplied online at http://www.parenteve.com/ as a self-extracting EXE file. Simply download the program and run it; it will extract itself and present a simple installer. Just press the 'Next' button and the program will install itself.
The program will put a submenu called "ParentEve" into the "Programs" section of your Start Menu. The program can be run from there simply by clicking on its icon. It also installs an icon on your desktop so you can start it from there as well.
The program can be uninstalled either from the "Uninstall" menu option in your Start Menu programs, or from the Control Panel's "Add/Remove Software" section.
The central concept in ParentEve is that of an event, which is a single parents evening, parent consultation or other function that you wish to schedule. Events are stored by the program in simple text files and when you use ParentEve you load and save these files just as you would any other document; you can alter your event as much as you like, and your changes are only made permanent once you save your file.
The event file contains all the information needed to create the schedule for one parents evening:
A schedule is an event with appointment times filled in for each parent's requests. One of ParentEve's most powerful features is that it can optimise schedules to minimise waiting times - a schedule is optimised by moving the appointments around but keeping the rest of the event's details unchanged.
ParentEve is licensed on a per-event basis, and it uses unlock codes to verify that you are licensed to use the software for the parents evening in question.
When you download the software, it will not have an unlock code and so it will be in demo mode. In demo mode you will only be able to define five teachers, five parents and five pupils. However, apart fron that restriction the full functionality of the software will be available to you. You will be able to evaluate how to use the software and whether you wish to make use of it.
To make the program edit a full parents evening, you will need an unlock code to be emailed to you - please contact Millerchip Software Ltd. to obtain one. Once you have your unlock code, you need to import it into your demo copy of ParentEve. All you need to do is open the unlock code entry window by selecting "Enter Unlock Code" from the Action menu. Simply copy and paste the email into this window and press "OK". The software will extract and store your unlock code, and enable you to define as many teachers, parents and pupils as you want.
The unlock code also defines the name of the school, the date and the event description that gets printed on the printouts. You can view these in the "Edit Event Details" window, but you cannot change them without getting a new unlock code.
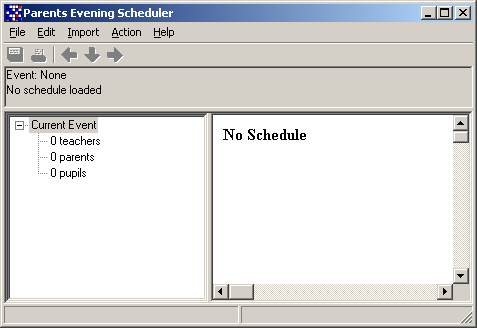
When the program starts up, no event is defined and the following window will appear:
In order to start working on an event you have two options:
When creating a new event, you will be asked to input the start and end times for the event. These default to 6:00pm and 10:00pm respectively, but you can change these. When inputting a time you must put it in in 12-hour format, with a colon separating the numbers and with "am" or "pm" directly afterwards. For example, "6:00pm" is a valid entry. The input window will look like this:
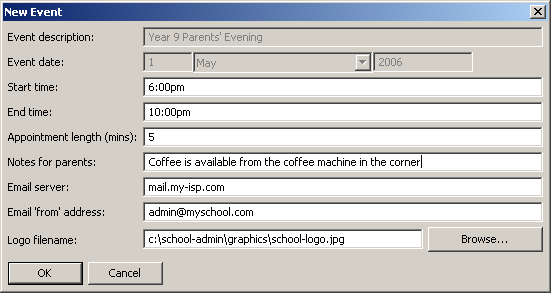
You can optionally enter the following pieces of information:
When a new event is defined it initially has no teachers, no parents and no pupils defined. You may add up to five of each if you do not have an unlock code, or an unlimited number if you have a valid unlock code.
The primary interface to the ParentEve program is its main window. It is composed of three areas:
|
Main Window - click to enlarge |
The toolbar contains icons representing some common operations and actions, and allows you to quickly perform these actions without having to select them from the menu. The buttons are, in order:
An important ability of the program is its ability to score and optimise a schedule. Schedules are given a score, which indicates how good they are at removing waiting times. The default scoring method is as follows:
Consequently, the most a schedule can ever score is 1,000 which represents a "perfect" schedule in which nobody has to wait around for too long. A typical default schedule created initially from an empty file scores around 300, whereas a typical optimised schedule which is used for actual parents evenings may score as highly as 980 or 985, depending on the length of time the program is given to optimise the schedule.
The scoring method can be changed if your school has different requirements. If you wish to change the acceptable wait times, select the"Edit Scoring..." menu option from the "Edit" menu and the following window will appear:

This allows you to set the maximum acceptable waiting time for both teachers and parents.
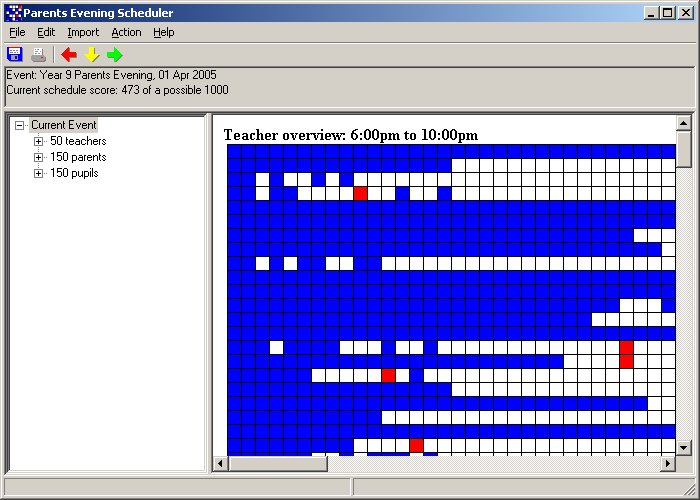
This area shows a graphical overview of the current schedule. If you have a small screen it may not all fit on, but you can scroll it around using the scroll bars on the left and bottom edges in order to see the whole thing.
The overview area consists of two grids, one representing the teachers and one representing the parents. The grids list people against time, so teachers and parents are listed down the side (the vertical axis) and time is considered to be the horizontal axis.
Each square represents a single appointment slot, with the start of the evening on the left hand side and the end on the right. Each square can be one of three colours:
A perfect schedule with a score of 1,000 will have no red squares, as the red squares represent penalty points which reduce the score. The overview is very useful for quickly seeing where there are problems in a schedule.
To add a teacher, select the "Add Teacher" menu option from the "Edit" menu. The following window will appear:

Teachers are defined by their "display name" and optionally by their initials. The teacher's "display name" must be defined - this is the name that will be printed on the parents' schedules, and it must be unique (i.e. no two teachers may share the same display name).
Optionally you may also define initials for each teacher. These merely give an alternate name or string of initials that this teacher may be known by. This is used to ease the inputting of the teachers that the pupils want to see. Again, each "initials" value must be unique, i.e. no two teachers may share the same initials. If an initials section is not supplied, the teacher must always be referred to by their display name.
Two other optional sections may also be supplied - the "before" and "after" sections. These both supply time constraints for the teacher in question, and their use tells the program when the teacher can accept appointments. Therefore, if a teacher cannot get in until 7pm, you should specify "after 7:00pm" or "after 19:00" for that teacher. It is possible to specify both a before and an after constraint for a teacher.
Teachers can optionally have locations defined for them - a location is simply the name of the place where the teacher will be for the event, for example a room name or a desk number. If you choose to define locations for your teachers the location names will be included on all printouts, allowing teachers to know where they are meant to be and allowing parents to find them easily.
Typical examples of locations include things like "Room M1, Maths Block" or "Desk 12". You can be as descriptive as you like as long as you do not run out of room on your printouts.
You can optionally specify the subjects taught by your teachers. If you do specify subjects they will be included on the parent printouts against the relevant teacher's name.
The subject field is free-format text and you can type anything you like in there. Again, you can be as descriptive as you like as long as you do not run out of room on your printouts.
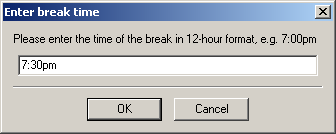
You may also define breaks at specific times for individual teachers. A break takes up a single timeslot, so if you wish to define a long break you have to specify each timeslot in the break. For example, to define a 10-minute break at 8pm you must put in two breaks as "8:00pm" and "8:05pm".
To add a parent, select the "Add Parent" menu option from the "Edit" menu. The following window will appear:
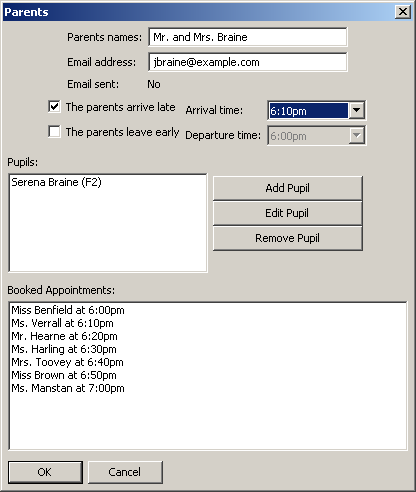
ParentEve insists that you define parents first, and then define the pupils belonging to the parents. ParentEve knows that one set of parents may have two children in the same year and consequently it needs to know which children belong to which parents. In the case of twins (or other such situations) it is vital that ParentEve should know that both twins belong to the same parents, as that way it can ensure that appointments relating to individual twins are held at different times.
A set of parents is defined by their "display name" in the same way as for Teachers. Time constraints can be defined in exactly the same way as for teachers too, so late arriving or early departing parents can be catered for.
You can also optionally define an email address for parents. If you define one then you can send the parent's schedule to them automatically via email instead of having to print it out, saving postage and admin costs.
You then need to define the pupils for each set of parents. In the vast majority of cases, each set of parents only has one pupil, but the program fully supports multiple pupils per parent (i.e. twins, triplets, non-twin siblings in the same school year and so on). To add a pupil, press the "Add Pupil" button on the right-hand side of the parent window. The following window will appear:
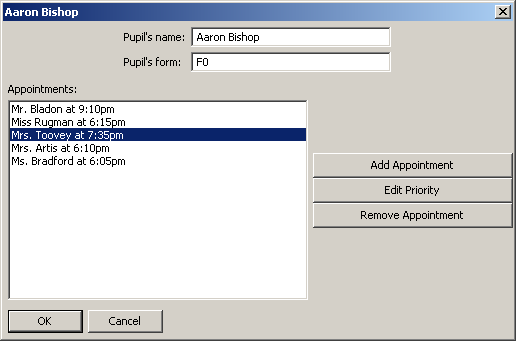
Pupils are defined by name, and you can optionally specify the form (i.e. house or tutor group) they are in. If you define a form for a pupil, the program will print the form on all handouts and will also group the pupils into forms on the left side of the main display, making it easier to find pupils.
For each pupil, a list of requested teachers needs to be given. These specify the teachers that the parents wish to see for each pupil. In order to add a request to see a teacher, press the "Add Appointment" button. The following window will appear:
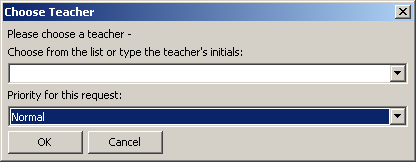
The teachers can be chosen quickest by typing their initials into the box, but this will only work if you have defined initials for each teacher. You can also choose teachers from a list by pressing the small arrow on the right and selecting the required teacher.
A priority can also be set against each request to see a teacher. The available priorities are:
The priorities are only relevant if you have too many appointments and they do not all fit in the parents' evening. In this case the priority system is used by ParentEve to automatically choose which requests do not get an appointment booked for them.
You can import lists of teachers, parents and pupils from files. This saves lots of time as it is quicker than typing in all the data manually. It also ensures that the data is correct, reducing the possibility of typing errors.
To import data into ParentEve, go to the "Import" menu and select either "Import Teachers from File" or "Import Parents from File". The following window will appear:
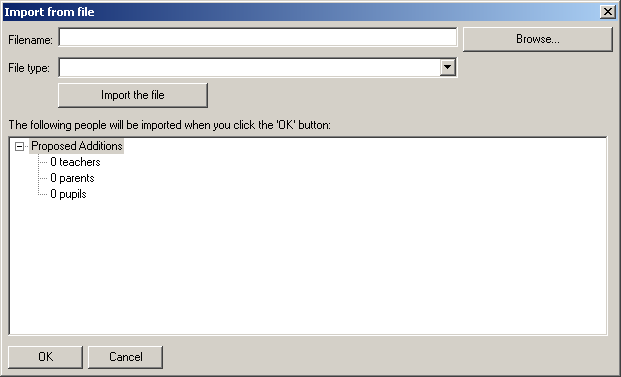
The "Filename" box stores the name of the file to be imported. Simply press the "Browse" button next to it and select the file that you wish to import.
The "File Type" box allows you to tell ParentEve what sort of file you are importing. A suitable default choice will be selected for you but if this is wrong you can change it by pressing the small arrow on the right hand side of the box and then selecting the correct type.
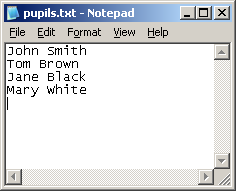
Both teachers and pupils can be imported from text files where one person is stored per line. These sort of files can be typed manually or exported from a suitable system - an example is shown below being typed in Notepad:
The pupil import also supports "XML" format files. This format is a UK government standard that all major school computer systems use for exchanging information. If you have a system such as Capita's SIMS you can export lists of your pupils in this format and ParentEve will be able to read them in.
After selecting the file and its type, press the button marked "Import the file". This will read the file's contents into the preview window below the button. As an example, if the file in Notepad (shown above) is imported, the window will look like this:
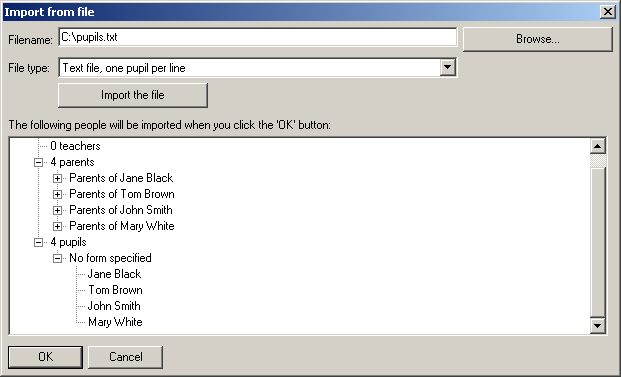
As you can see, parents have been created for each of the pupils. Also note that the parents and pupils are shown in alphabetical order, not the order they occured in the file.
At this point, the import has not actually happened and you can cancel out of this window without affecting your event. However, if this import looks correct then simply press the "OK" button and the new teachers, parents or pupils will be merged into your event.
As you find out which teachers need to be seen and fill in the appointments, you will notice that the program will put the phrase "Not booked yet" against the appointment in the pupil window. This is because the program has not yet worked out an appointment time.
In order to place the new requests into the current schedule, click the yellow arrow in the toolbar. This is the "Book in Unbooked Requests" button, and it ensures that all outstanding requests have times booked for them. The program will prevent you from printing if you have any unbooked requests, so if this happens to you simply click the yellow arrow.
The "Optimise" option (the green arrow in the toolbar) will start optimising the schedule you currently have from the state it is currently in. The following window will appear and will instantly start optimising your schedule:
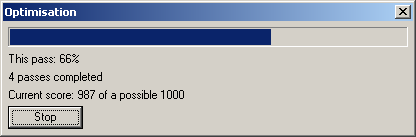
It is guaranteed that the schedule cannot get a worse score if you pick this option. The optimisation process will continue until the score reaches 1,000 (a perfect score), but it may be safely stopped at any point by pressing the "Stop" button.
You do not have to wait until the score reaches 1,000 - indeed, it may not be possible for the program to find a perfect solution. This doesn't matter, as you can still run a quite acceptable parents evening with a high but not perfect score.
As the optimiser runs, the overview area will constantly update to show the optimiser's progress. You can watch the squares turn from red to blue as the appointments get reshuffled in a more and more efficient way.
It is occasionally desirable to restart the optimisation process, because occasionally the optimisation gets "stuck" at a score like 960 or 970, and cannot get up to good scores like 985. This is more likely to happen when you have added some new information from late parent slips.
If this happens, the "Rebook" option (the red arrow on the toolbar) is needed. Selecting this option will clear out all of the current appointments, and will rebook them all in using a "first-come-first-served" method.
The resulting schedule will score very low, but it allows you to start the optimisation again from scratch. The overview area will show a large block of blue squares against the left-hand edge (resulting from the first-come-first-served booking), and there will be many red squares as the appointments tail off towards the end of the evening. However, the situation will rapidly improve with a short run of the optimiser and a good score is more likely.
In order to print, click on the small printer in the toolbar. You will see a "Print Preview" window open, which will look like this:
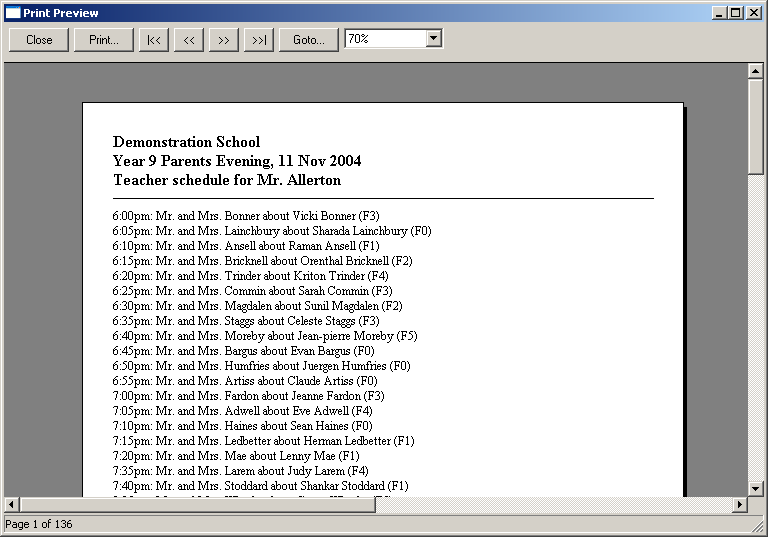
The window will allow you to see all the handouts which will be printed. There are three types of handouts, which appear in the following order:
You do not have to print out all the handouts - if you only wish to print some, note down the page numbers you wish to print. Then when you hit "Print" you can select the page range to print.
A common situation is where you have entered all of the school's teachers in one event, and you wish to reuse this list for another event - for example, when setting up new events for the youngest year in the school.
In order to do this, select the "Delete Parents and Pupils" option from the "Edit" menu. This will remove all of the parents, pupils and requested appointments, leaving just the teachers. This schedule can then be saved to a different filename using the "Save As" option from the "File" menu.
Another common situation is where you have done a parents evening last year, and the pupils in question have now moved up a year and you wish to reuse the old file as a basis for the new parents evening.
This is done by selecting the "Delete Appointments" option from the "Edit" menu. This removes all requests for parents to see teachers, and all the overview squares will turn white. As the parents send in the information about who they wish to see, you can book the appointments in as usual.
Website design by Peter Millerchip
Copyright 2001-2006 Millerchip Software Ltd.